BARN QUILT LEARNING CENTER
How to Paint Clean Straight Lines on a Barn Quilt
Straight lines depend on the entire paint system. A premium tape cannot compensate for dust, surface ridges, weak primer adhesion, heavy paint, or hurried masking over a soft coat.
- Skill level
- Beginner
- Planning time
- Varies by pattern
Create a tape-ready surface
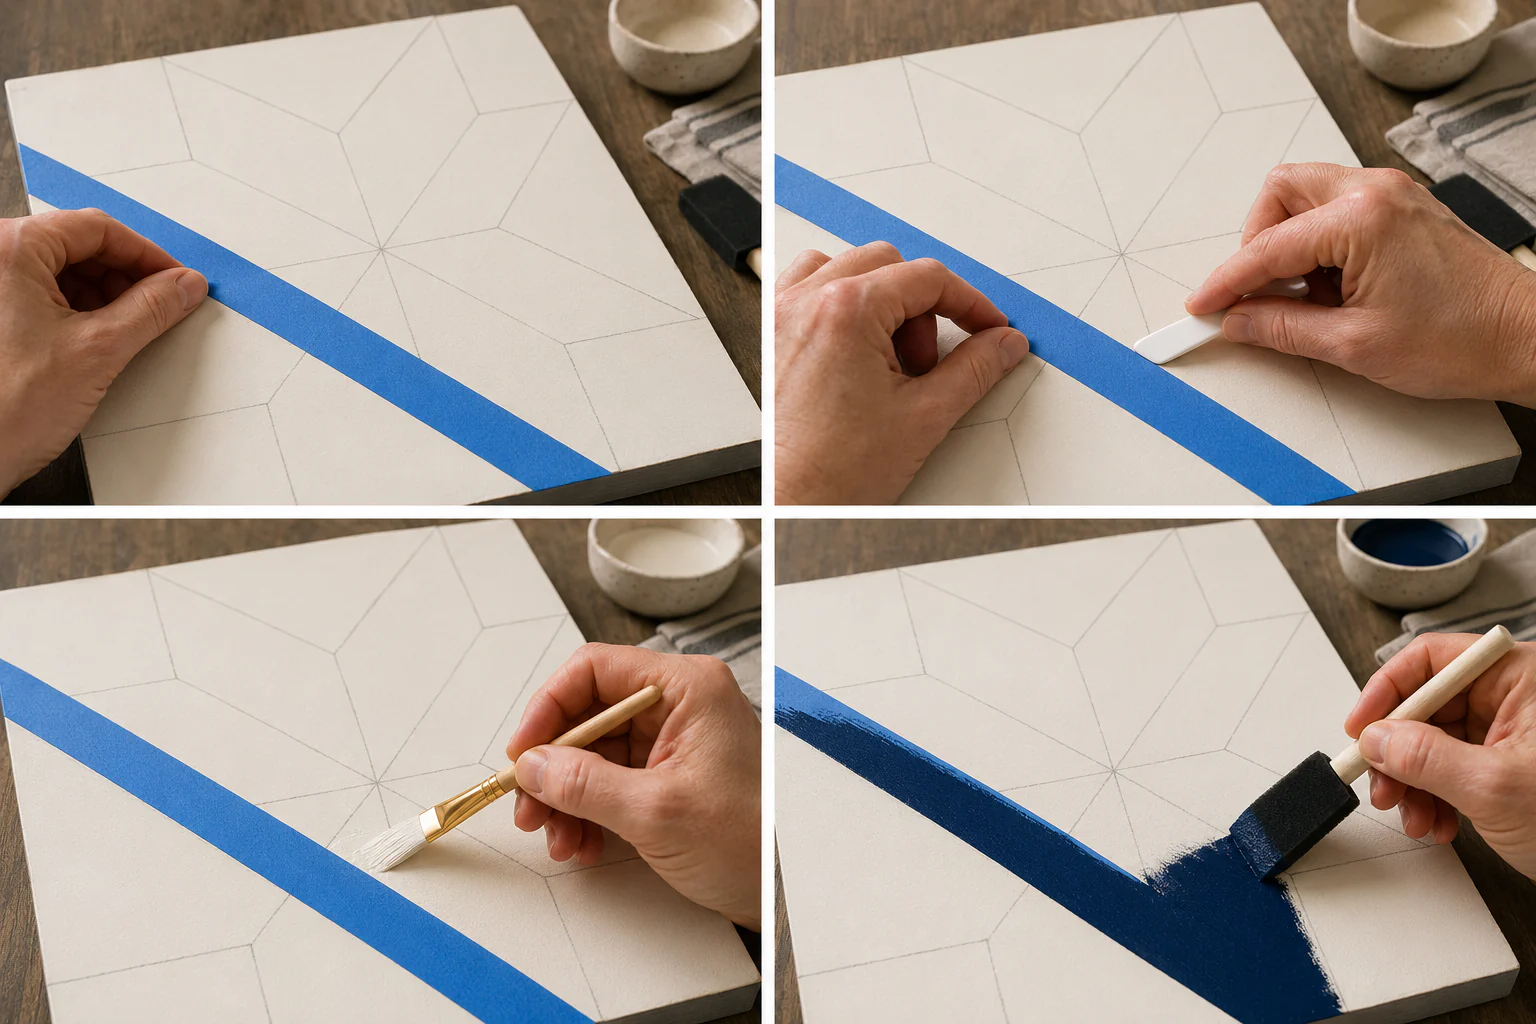
Use compatible primer and base paint, apply smooth coats, and wait until the base is ready to receive tape. Remove dust without leaving residue.
Draw an exact boundary
Use a straightedge long enough to span the relevant points. Confirm the line against the pattern before covering it with tape.
Align the active tape edge
Place the tape on the side that will remain unpainted. Sight along the entire edge before burnishing.
Seal vulnerable edges
For textured or bleed-prone surfaces, apply a thin film of the underlying color along the tape edge. This fills small channels with a color that already belongs there.
Control the paint load
Use a lightly loaded brush or foam tool and move paint away from the tape. Build coverage with thin coats rather than flooding the boundary.
Remove tape cleanly
Pull the tape back over itself at a low angle. Determine the best timing with a system test because paints and conditions behave differently.
Repair only what is wrong
Let the line stabilize. Use a small brush, straightedge reference, and thin neighboring color to restore the boundary without widening the repair.
Helpful tips
- A fresh tape edge matters more than using one extremely long piece.
- Inspect at normal viewing distance before chasing microscopic variation.
- Keep the base-color paint available until the project is complete.
Frequently asked questions
Why are my lines fuzzy?
Likely causes include texture, dust, weak tape contact, heavy paint, or paint pushed toward the edge.
Can I freehand the lines?
A skilled painter can, but masking provides a more repeatable beginner workflow for geometric blocks.